Elementor Search Form Walkthrough
How Can We Help?
You can now use the Elementor Form widget to build search forms for your website, rather than using the property search widget. Using the Elementor form builder allows much more control over the styling and layout of the search form but there are some important settings to use in order to make it work effectively.
1 Add Form widget to your page
Select the Form widget and drag this onto your page. You will need to then add the various search options you want to your form.
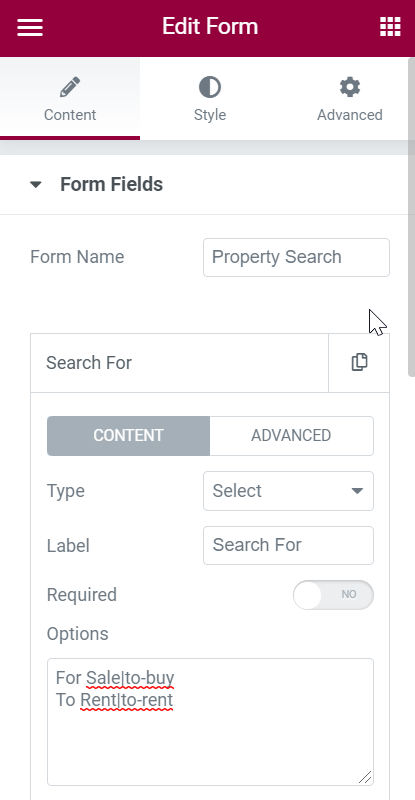
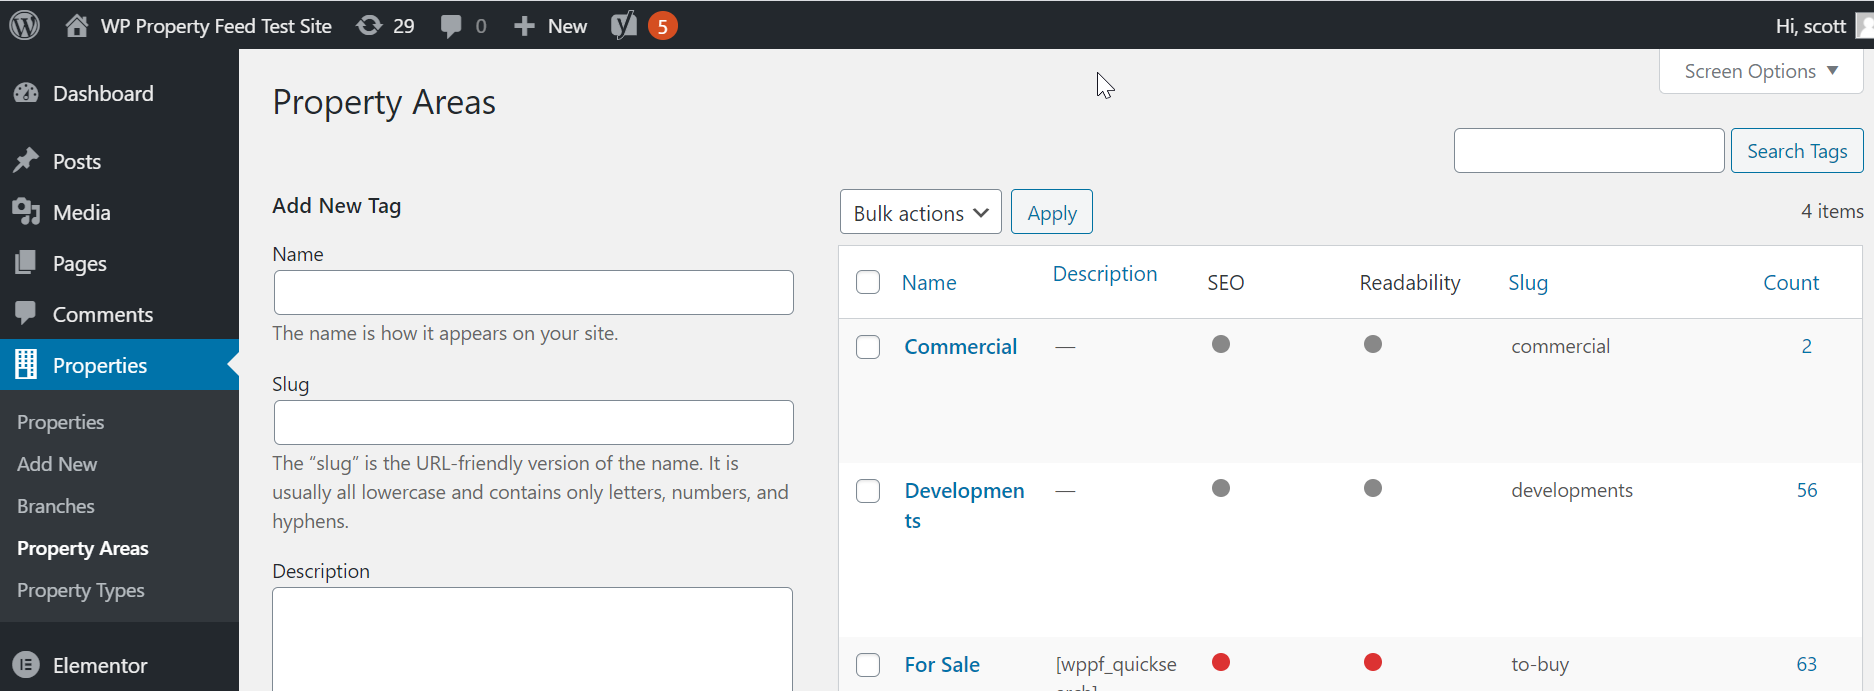
This image shows the basic settings of the first field in our form which is used to select the broad area of search we want – For Sale or To Rent in this case. The options are the available options and values (separated by a | character) in this case are the taxonomy slugs. There are 3 search fields that use taxonomy slugs, which are Branches, Property Areas (this one in this example and Property Types). To get a list of the available slugs go to the “Properties” in your WordPress admin and click on the appropriate submenu option. This will show you a list of options and slugs as shown below;
Once you have your field and selections added you will need to click the “Advanced” tab in the field properties in order to add the correct field name and default values
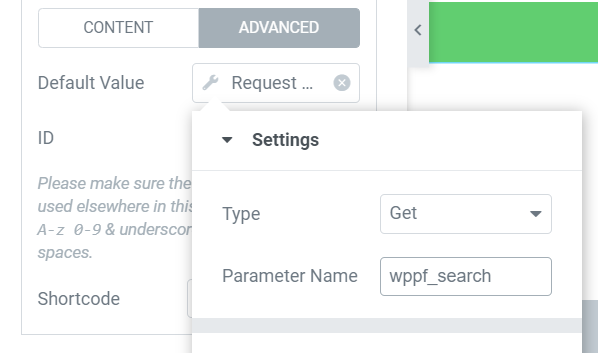
The default values only need to be set if your form is being displayed on the property archive page since you will want the form to reflect the search being performed in this case. In that case for the default value select the dynamic tags and choose “Site > Request Parameter” from the drop down then in parameter name enter the form field id for this form item.
In all cases you will need to enter an ID for field and these need to be from the list below in order to make the search work. Below also shows the ideal type of field to use for each value and what selections if any to set. You may use as many or as few of these field options below and may add any as hidden field too.
| ID | Type | Options |
|---|---|---|
| wppf_branch | Select | use slug value from “Branch” Taxonomy |
| wppf_search (comma separated list of; to-buy, to-rent, commercial) | Select | use slug value from “Property Areas” Taxonomy |
| wppf_location | Text | User entry, will search address/postcode for text |
| wppf_featured | Checkbox or Select | Value should be “yes” to search only featured properties |
| wppf_min_bedrooms | Select or Number | |
| wppf_max_bedrooms | Select or Number | |
| wppf_min_price | Select or Number | |
| wppf_max_price | Select or Number | |
| wppf_min_rent | Select or Number | |
| wppf_max_rent | Select or Number | |
| wppf_min_area | Select or Number | |
| wppf_max_area | Select or Number | |
| wppf_property_type | Select | use slug value from “Property Type” Taxonomy |
| wppf_status | Select | Status is a text value from the feed and can be any value so avoid using unless you want a specific search |
| wppf_user1 | Select | |
| wppf_newbuild | Checkbox or Select | “yes” |
| wppf_lettype | Select | Let type varies from feed to feed but generally will include “Student”, “Professional”, etc |
| wppf_furnished | Select or Radio | Furnished, Un-Furnished, Part-Furnished, Not Specified |
| wppf_soldlet | Select | hide or show – hide will hide an properties that are sold, let, let agreed, sstc – show will show all properties including sold and let |
| wppf_orderby | Select | price-asc, price-desc or latest, default is price desc unless search by location then default is nearest |
| wppf_radius | Select or Number | distance in miles from the location center for location searches only |
| wppf_records | Select or Number | number of records to return per page, -1 will return all records on a single page |
Set Actions After Submit
In order to get the form to post to the property archive page with the settings in the field you will need to set the “Actions After Submit” action to “Property Search” as that will the set the correct path for the form.